
Get Printing! #
console.log(’’) for printing. We will learn another method for printing variables along with strings later in the article!
Chapter 1 - Variables #
let name = ‘Pratham’ const ID = ‘331’
let prefix means value can change in the future and const prefix means value will remain constant.
const name = 'Addy'
const favColor = 'Green'
let currentLocation = 'Delhi'
let mood = 'Chill'


console.log(name)
console.log(favColor)
console.log(currentLocation)
console.log(mood)


mood = 'Pissed'
console.log(mood)
Data Types
const companyName = 'Supercell';
const foundingYear = 2010;
let isActive = true;
let fundingAmount; //undefined data type

console.log(companyName);
console.log(foundingYear);
console.log(isActive);
console.log(fundingAmount);
Operators
let currentTempF = 56;
console.log('Temp in East Delhi (in F) =', currentTempF)

let currentTempC = (currentTempF - 32)/1.8
console.log('Temp in East Delhi (in C) =', currentTempC)
Output- Temp in East Delhi (in F) = 56 Temp in East Delhi (in C) = 13.333333333333332
Exponents
let weight = 50;
console.log("Weight (in kgs) =", weight);
let height = 183;
console.log("Height (in meters) =", height);

let bmi = weight/height**2
console.log(bmi)
Output- Weight (in kgs) = 50 Height (in meters) = 183 0.0014930275612887814
Fun fact - BMI is an archaic and oversimplified way to measure personal health. It was created by a mathematician – not a doctor! 💡
Recap of the lesson
let weight = 50;
console.log("Weight on Earth:", weight);

let weightOnMars = weight*0.38;
let weightOnMoon = weight/6;

console.log('Weight on Mars:', weightOnMars);
console.log('Weight on Moon:', weightOnMoon);
Output- Weight on Earth: 50 Weight on Mars: 19 Weight on Moon: 8.333333333333334
Chapter 2: Conditionals #
let hour = 11;
if (hour<12){
  console.log("Good morning! 🌞")
}
Output- Good morning! 🌞
let hour = 23;

if (hour<12) {
  console.log("Good morning! 🌞")
}

else {
  console.log("It\'s not morning anymore")
}
Output- It’s not morning anymore
let pH = 3;

if (pH>7) {
  console.log("Basic Solution");
}

else if (pH<7) {
  console.log("Acidic Solution");
}

else {
  console.log("Neutral Solution");
}
Output- Acidic Solution
Magic 8 ball #
let question = 'Will I get better at Coding?';
const randomNumber = Math.floor(Math.random()*9)+1;
console.log("Question:", question);

if (randomNumber === 1){
  console.log("Magic 8 Ball: Yes - definitely.")
}

if (randomNumber === 2){
 console.log("Magic 8 Ball: It is decidedly so.")
}

if (randomNumber === 3){
  console.log("Magic 8 Ball: Without a doubt.")
}

if (randomNumber === 4){
  console.log("Magic 8 Ball: Reply hazy, try again.")
}

if (randomNumber === 5){
  console.log("Magic 8 Ball: Ask again later.")
}

if (randomNumber === 6){
  console.log("Magic 8 Ball: Better not tell you now.")
}

if (randomNumber === 7){
 console.log("Magic 8 Ball: My sources say no.")
}

if (randomNumber === 8){
  console.log("Magic 8 Ball: Outlook not so good.")
}

if (randomNumber === 9){
  console.log("Magic 8 Ball: Very doubtful.")
}

if (randomNumber === 10){
  console.log("Magic 8 Ball: Probably.")
}
Output- Question: Will I get better at Coding? Magic 8 Ball: Yes - definitely.
Note: const randomNumber = Math.floor(Math.random()*9)+1;
This line is the random number generator.
- Math.random() generates a float between 0 (inclusive) and 1 (exclusive)
- Multiplying by n makes the range 0 to < n
- Math.floor() rounds down to the nearest integer (0 to 10)
- We add 1 so it starts from 1 and not from 0 like it does by default
AQI Checker #
let aqi = 800;
if (0<aqi && aqi<50) {
  console.log("Good")
}
if (51<aqi && aqi<100) {
  console.log("Moderate")
}
if (101<aqi && aqi<150){
  console.log("Unhealthy for sensitive people")
}
if (151<aqi && aqi<200){
  console.log("Unhealthy for all")
}
if (201<aqi && aqi<300){
  console.log("Very Unhealthy")
}
else{
  console.log('Hazardous')
}
Output- Hazardous
Note: For comparing inside the if statement, we can not write
if (0<aqi<50){ whatever }
In JavaScript, this will be read as (assuming aqi=800) 0<800 //True 1<50 //False (because True =1) i.e. final answer would be False/0 which is not what we are going for. Always to multiple comparisions in Java script using logical and and logical or.
Rock Paper Scissors! #
let choice = 0; //0=Rock 1= Paper 2=Scissors
console.log("Player picked:")
if (choice == 0){
  console.log("Rock")
}
else if (choice == 1){
  console.log("Paper")
}
else{
  console.log("Scissors")
}
const randomNumber = Math.floor(Math.random()*3);
console.log("The computer picked:")

if (randomNumber == 0){
  console.log("Rock")
}
else if (randomNumber == 1){
  console.log("Paper")
}
else{
  console.log("Scissors")
}
if (choice == 0 && randomNumber == 2){
  console.log("The player won!")
}
else if (choice == 1 && randomNumber == 0){
  console.log("The player won!")
}
else if (choice == 2 && randomNumber == 1){
  console.log("The player won!")
}
else if ( choice == randomNumber){
  console.log("It\'s a tie!")
}
else{
  console.log("The computer won.")
}
Output- Player picked: Rock The computer picked: Scissors The player won!
TGIF #
let day = 7;

if(day<=4){
  console.log('Not Friday, yet!')
}

else if(day == 5){
  console.log("TGIF 🕺")
}

else if (day == 6 || day == 7){
  console.log("Yay, weekends! 🙌")
}

else{
  console.log("Wait, what day is it?")
}
While loops #
const luckyNumber = 8;
let guess = Math.floor(Math.random() * 10) + 1;
while (guess != luckyNumber){
  console.log("Nope, it isn\'t", guess)
  guess = Math.floor(Math.random() * 10) + 1;
}
console.log("My lucky number is " + luckyNumber + '!')
Output - Nope, it isn’t 7 Nope, it isn’t 3 Nope, it isn’t 10 Nope, it isn’t 7 Nope, it isn’t 7 Nope, it isn’t 5 Nope, it isn’t 9 My lucky number is 8!
For loops #
for (let i = 1; i<101; i++){
  console.log("I Must Not Tell Lies.")
}
Output-
I Must Not Tell Lies (a hundred Times)
Continue and Break Keywords #
Continue = Skips the current iteration (if condition is true) of the while/for loop and continues from the next iteration
Break = Breaks the loop (if the condition is true)
for (let i = 1; i<51; i++){
  if(i%2==1){
    continue
  }
  else if(i===42){
    console.log(i)
    break
  }
  else{
    console.log(i)
  }
}
Output - 2 4 6 8 10 12 14 16 18 20 22 24 26 28 30 32 34 36 38 40 42
Binary Number Convertor #
let myNumber = 6
let binary =''
while (myNumber != 0){
  let rem = myNumber % 2;
  if (rem === 0){
    binary ="0" + binary
    }
  else if (rem === 1){
    binary ='1' + binary
  }
  myNumber = Math.floor(myNumber/2)
}

console.log(binary)
Output - 110
Chapter 3: Data Structures #
Arrays #
Collection of elements in a single variable
Adding and Deleting elements #
unshift = Element added at the front of the array push = Element added at the end of the array shift = Element deleted (and returned) from the front of the array pop = Element deleted (and returned) from the end of the array
Note: For every new element added/removed to an array with the unshift() and shift() method, the indices of the other elements are shifted up by +/-1.
const musicPlaylist = [
  "Tom Sawyer",
  "Sabotage",
  "I Wanna Dance With Somebody",
  "Don't Speak",
  "Bulls On Parade",
  "Thriller",
  "The Breaks",
  "Brick",
  "Aeroplane Over the Sea",
  "Tubthumping"
];
musicPlaylist.shift();
musicPlaylist.pop();
musicPlaylist.push('Judas');
musicPlaylist.unshift('Skyfall','Golden');
console.log(musicPlaylist);
Output - [ ‘Skyfall’, ‘Golden’, ‘Sabotage’, ‘I Wanna Dance With Somebody’, “Don’t Speak”, ‘Bulls On Parade’, ‘Thriller’, ‘The Breaks’, ‘Brick’, ‘Aeroplane Over the Sea’, ‘Judas’ ]
Methods #
arrayName.includes(’element’) - Checks whether the element is present in the array or not and returns True or False.
arrayName.indexOf(’element) - Gives the index of the element If element is not present, -1 is returned and if more than one element is the same then the first occurrence is returned
const characters = [
  "The Wally Watchers",
  "Wilma",
  "Fritz",
  "Wizard Whitebeard",
  "Odlaw",
  "Waldo",
  "Woof"
];
if (characters.includes('Waldo')){
  const waldoIndex = characters.indexOf('Waldo');
  console.log('Found Waldo at index ' + waldoIndex + '!');
}
else{
  console.log("Not found");
}
Output - Found Waldo at index 5!
Making DNA! #
Q. Create a 24-element myDNA array of that by randomly choosing one of these four pieces. Start with the following array:
const dnaPieces = ["A", "C", "G", "T"];
const dnaPieces = ["A", "C", "G", "T"];

myDNA=[];

for (let i =0; i<25; i++){

  myDNA.unshift(dnaPieces[Math.floor(Math.random() * 4)] +

  dnaPieces[Math.floor(Math.random() * 4)] +

  dnaPieces[Math.floor(Math.random() * 4)])

}

console.log(myDNA)
Output - [ ‘AAG’, ‘GTT’, ‘GTA’, ‘GTC’, ‘TGG’, ‘CTA’, ‘TCT’, ‘CAG’, ‘AAT’, ‘GGG’, ‘CGT’, ‘CTG’, ‘CGC’, ‘AGT’, ‘CTT’, ‘ACA’, ‘CAT’, ‘GCT’, ‘GTG’, ‘TAC’, ‘ATG’, ‘CTT’, ‘ATT’, ‘CAC’, ‘ACA’ ]
Functions #
Reusable block of that can be called later in the code to decrease redundancy
Q. Find the mean and median views on different platforms using functions const recentTikTokViews = [1932, 2300, 453, 5222, 6733, 7402, 8334]; const recentInstagramViews = [936, 2576, 453, 7013, 5489, 7402, 3921]; const recentYouTubeViews = [2300, 453, 5222, 989, 6733, 7402, 2789];
function mean(viewsArray){
  let totalViews = 0;
  for (let i = 0; i<viewsArray.length; i++){
    totalViews = totalViews + viewsArray[i];
  }
  console.log(totalViews/2);
}

function median(viewsArray){
  viewsArray.sort((a,b) => a -b);
  let i = Math.floor(viewsArray.length/2);
  console.log(viewsArray[i]);
}

console.log('Tiktok');
console.log('Mean:');
mean(recentTikTokViews = [1932, 2300, 453, 5222, 6733, 7402, 8334]);
console.log('Median:');
median(recentTikTokViews = [1932, 2300, 453, 5222, 6733, 7402, 8334]);

console.log('Instagram')
console.log('Mean:');
mean(recentInstagramViews = [936, 2576, 453, 7013, 5489, 7402, 3921]);
console.log('Median:');
median(recentInstagramViews = [936, 2576, 453, 7013, 5489, 7402, 3921]);
console.log('Mean:');

console.log('Youtube:');
console.log('Mean')
mean(recentYouTubeViews = [2300, 453, 5222, 989, 6733, 7402, 2789]);
console.log('Median:');
median(recentYouTubeViews = [2300, 453, 5222, 989, 6733, 7402, 2789]);
Output - TiktokMean: 16188 Median: 5222 Instagram Mean: 13895 Median: 3921 Mean: Youtube: Mean 12944 Median: 2789
Sorting an array #
Ascending order Array.sort((a,b) => a -b);
Descending order viewsArray.sort((a,b) => b-a);
Error! #
function mean(viewsArray){
  let totalViews = 0;
  for (let i = 0; i<=viewsArray.length; i++){ //WRONG END
    totalViews = totalViews + viewsArray[i];
  }
  console.log(totalViews/2);
}

function median(viewsArray){
  viewsArray.sort((a,b) => a -b);
  let i = Math.floor(viewsArray.length/2);
  console.log(viewsArray[i]);
}

mean([12,12]);
median([12,34,56])
The issue here is the condition i <= viewsArray.length. Arrays are zero-indexed, meaning the last element is at viewsArray.length - 1. When i reaches viewsArray.length, viewsArray[i] is undefined, and adding undefined to your total results in NaN
Palindrome #
function isPalindrome(word){
  let newWord = word.toLowerCase()
  let ans = '';
  for (let i = newWord.length - 1; i >= 0; i--){
    ans += newWord[i];
  }
  if (ans === newWord){
    return true;
  }
  else{
    return false;
  }
}
console.log(isPalindrome('Racecar'))
Output- true
Arrow Functions #
Concise way of writing small functions that increase readability by removing return and curly braces.
const numbers = [1, 2, 3, 4, 5];
const squaredNumbers = numbers.map((num) => num ** 2);
console.log(squaredNumbers);
Output - [1, 4, 9, 16, 25]
Objects #
Another way of storing multiple values in one variable. Stores information in key value pairs. Key and value together are called a Property and they are separated by a colon ‘:’. Different properties in an object are separated by commas ‘,’.
Here’s an example -
const car = {
  model: 'Tesla',
  year: 2025,
  color: 'Pink',
  used: false
};

if (car.used === true){
console.log("I\'m looking for a " + car.color + car.year + car.model + "that is used. ")
}
else{
console.log(`I\'m looking for a ${car.color} ${car.year} ${car.model} that is new.`);
}
${ variable } is a concise and easy way to log out variables with strings in our output. But this method uses backticks " ` " instead of double and single quote marks.
Output-
I’m looking for a Pink 2025 Tesla that is new.
Updating and Adding new properties #
pokemon = {
  name: "Chansey",
  type: "Fairy 🧚🏻",
  level: 25,
}

pokemon.isCaught = false;  //adding a new property
console.log(pokemon)

pokemon.isCaught = true;
pokemon.name = 'Pinky'; //modifying value of a property
console.log(pokemon)
Output -
{ name: ‘Chansey’, type: ‘Fairy 🧚🏻’, level: 25, isCaught: false } { name: ‘Pinky’, type: ‘Fairy 🧚🏻’, level: 25, isCaught: true }
Functions as properties in objects #
There are 2 ways to add functions as properties in objects. Such functions are called ‘Methods’. The most common way of using Methods -
const pig ={
  name: 'Nosey',
  type: 'Pig',
  age: '6',
  makeSound(){
	    console.log(` ${pig.name} is a ${pig.age} year old ${pig.type} that goes oink oink 🐷.`)

    //here the key is the name of the property and the matter inside the function is the value.


  }
}

const sheep ={
  name: 'Fluffy',
  type: 'Sheep',
  age: '8',
  makeSound(){
    console.log(` ${sheep.name} is a ${sheep.age} year old ${sheep.type} that goes baaaahhh 🐑.`)
  }
}
const dog ={
  name: 'Hunter',
  type: 'Dog',
  age: '3',
  makeSound(){
    console.log(` ${dog.name} is a ${dog.age} year old ${dog.type} that goes woof 🐶.`)
  }
}
pig.makeSound();
sheep.makeSound();
dog.makeSound();
Output -
Nosey is a 6 year old Pig that goes oink oink 🐷. Fluffy is a 8 year old Sheep that goes baaaahhh 🐑. Hunter is a 3 year old Dog that goes woof 🐶.
2nd method #
const phone = {
  model: "iPhone 11 Pro Max",
  brand: "Apple",
  version: 11.6,
  owner: "John Appleseed",
  ringtone: function () {
    console.log("Ring, ring! Ring, ring! 📲")
  }
}

phone.ringtone();
Output -
Ring, ring! Ring, ring! 📲
Revising all concepts with one code
const departTripTicket = {
  name: 'Pratham Dhyani',
  from: 'India',
  to: 'Scotland',
  businessClass: false,
  upgrade(){
    if (departTripTicket.businessClass === false){
      departTripTicket.businessClass = true;
      console.log(departTripTicket.businessClass)
    }
    else{
      console.log('Your ticket is already business class!')
    }
  },
  leaveTime: 10,
  arrivalTime: 22,
  flightTime(){
    console.log(`You will have to travel for a total of   ${Math.abs(departTripTicket.leaveTime - departTripTicket.arrivalTime)} hours.`)

    //Maths.abs() gives a positive/absolute value always.

  }
}


const returnTripTicket = {
  name: 'Pratham Dhyani',
  from: 'Scotland',
  to: 'India',
  businessClass: true,
  upgrade(){
    if (departTripTicket.businessClass === false){
      departTripTicket.businessClass = true;
      console.log(returnTripTicket.businessClass)
    }
    else{
      console.log('Your ticket is already business class!')
    }
  },
  leaveTime: 18,
  arrivalTime: 8,
  flightTime(){
    console.log(`You will have to travel for a total of ${Math.abs(returnTripTicket.leaveTime - returnTripTicket.arrivalTime)} hours.`)


  }
}

departTripTicket.upgrade();
departTripTicket.flightTime();
returnTripTicket.upgrade();
returnTripTicket.flightTime();
Output-
true You will have to travel for a total of 12 hours. Your ticket is already business class! You will have to travel for a total of 10 hours.
Chapter 4: DOM! #
DOM stands for Document Object Model. It is the relationship between different elements present on the website. It is a representation of a web page that defines relationships between it’s elements and allows them to be accessed and manipulated using JavaScript.
We generally use classes and IDs from the HTML code to access elements in JavaScript and make modifications.
.querySelector() #
Helps in modifying elements by selecting an element, class or id inside the parenthesis.
document.querySelector('div').innerHTML
.innerHTML helps in changing the inner HTML code of the web page directly
.getElementsByClassName() #
Used if we want to access multiple elements which share the same class
console.log(document.getElementsByClassName("post"));
Output - HTMLCollection(2) [div#status-update.post, div#posted.post, status-update: div#status-update.post, posted: div#posted.post]
This output is in the form of array and each element can be accessed using indices.
.getElementById() #
Choose ID specific elements
document.getElementById("posted").querySelector("p");
Output - <p>I’m about to take off!</p>
Updating elements #
First we need to select the element and store them in a variable and then we can change the value of that variable to reflect changes.
let drakePicTwo = document.getElementById("drake-pic-2");
// Change its src attribute
drakePicTwo.src = "https://i.imgur.com/RGbh6zY.png";
// Select the <h1> element and store it in heading
let heading = document.getElementById('heading-2');
// Change its innerText content
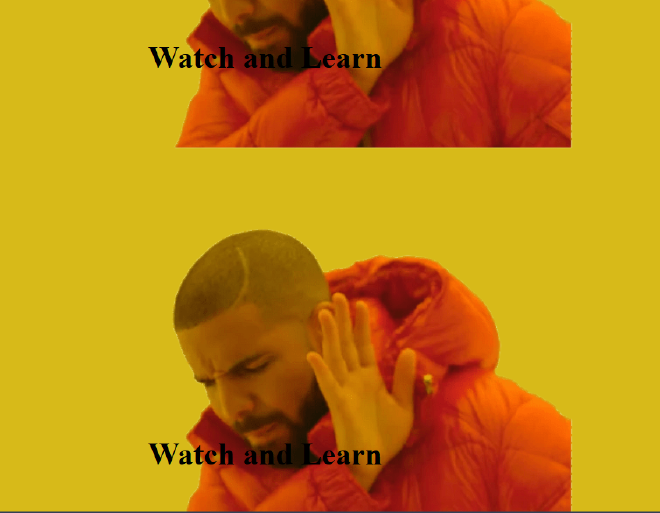
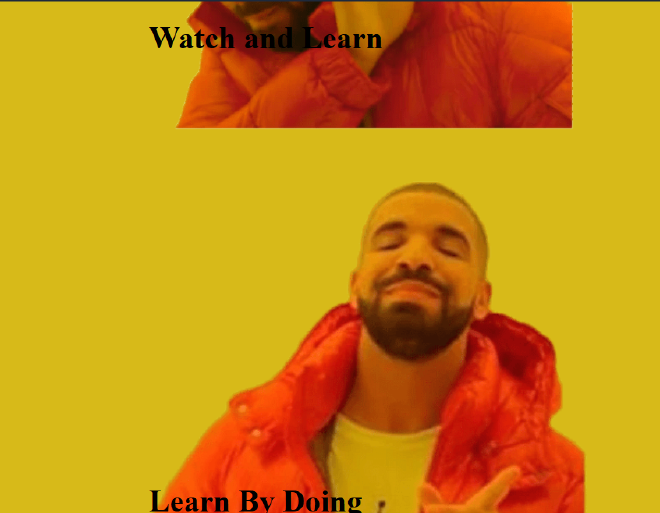
heading.innerText = "Learn By Doing";
Before -
After-
DOM manipulation (in CSS!) #
We can also use DOM to make changes in the CSS!
document.getElementById("posts").style.color = 'red';
Above is an example of changing the text color of the Element of that ID. Similarly we can change the property after ‘.style’ to padding, margin etc. and change those attributes too!
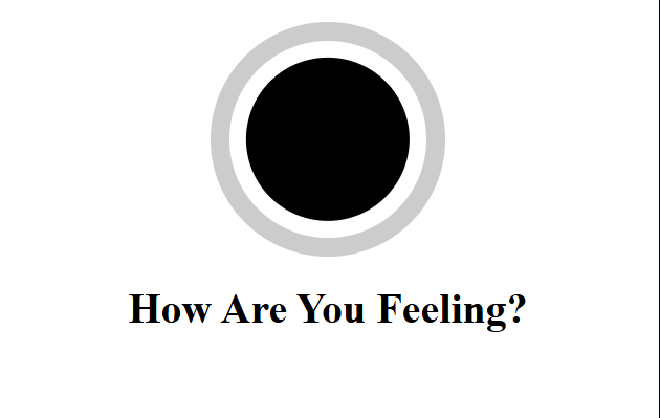
Let’s make a mood ring using HTML, CSS AND JS! (codes given in the respective order)
<!DOCTYPE html>
<html lang="en">
<head>
  <link rel="stylesheet" href="styles.css">
<title>Mood Ring</title>
</head>
<body>
  <div class="mood-ring" id="moodRing">
    <div class="stone" id="stone"></div>
  </div>
  <h1>How Are You Feeling?</h1>
  <script src="script.js"></script>
</body>
</html>
body {
  text-align: center;
}

.mood-ring {
  width: 150px;
  height: 150px;
  margin: 20px auto;
  border: 15px solid #ccc;
  border-radius: 50%;
  position: relative;
}

.stone {
  width: 125px;
  height: 125px;
  background-color: #3498db; /* Default color */
  border-radius: 50%;
  position: absolute;
  top: 50%;
  left: 50%;
  transform: translate(-50%, -50%);
  transition: background-color 0.5s ease-in-out;
}
let a = document.getElementById('stone'); //storing element in a variable


const colors = [   //making an array to store colors

  'red',

  'orange',

  'yellow',

  'green',

  'blue',

  '#4169e1',

  '#00008b',

  'purple',

  'black'

];


let randomNumber = Math.floor(Math.random() * colors.length);

a.style.backgroundColor = colors[randomNumber]; //using DOM to make changes in the CSS!
Output -

Events #
Certain things change on websites when an event occurs such as hovering the cursor over button or pressing the button or pressing a certain key on the keyboard. We achieve these by making events in JS.
Here’s an example of a website which generates a random quote and a random color on every press of a button.
HTML -
<!DOCTYPE html>
<html lang="en">
<head>
  <link href="styles.css" rel="stylesheet" />
  <title>Chill Pill</title>
</head>
<body>
  <div id="wrapper">
    <h1>Quote Generator</h1>
    <h2>Relax and Take a Chill Pill</h2>
    <div id="quote-div">
      <p id="quote-text"></p>
    </div>
    <button id="quote-button">Generate Quote</button>
  </div>
  <script src="script.js"></script>
</body>
</html>
CSS -
#wrapper {
  border: 2px solid black;
  border-radius: 5px;
  width: 50%;
  margin: 25vh auto;
  padding: 10px;
  text-align: center;
  transition: background-color 0.5s ease-in-out;
}

#quote-div {
  border: 1px solid black;
  border-radius: 5px;
  width: 75%;
  margin: 10px auto;
  background-color: #fff;
}
JavaScript -
const quoteList = [
  "Some doors only open from the inside. Breath is a way of accessing that door.",
  "What has to be taught first, is the breath.",
  "Remember the blue sky. It may at times be obscured by clouds, but it is always there.",
  "In the midst of movement and chaos, keep stillness inside of you.",
  "We can't control the sea, but we can learn how to surf the waves.",
  "Feelings come and go like clouds in a windy sky. Conscious breathing is my anchor.",
  "To understand the immeasurable, the mind must be extraordinarily quiet, still."
];

const colors = [
  "#e81416",
  "#ffa500",
  "#faeb36",
  "#79c314",
  "#487de7",
  "#4b369d",
  "#70369d"
];

const wrapperDiv = document.getElementById("wrapper");
const quoteText = document.getElementById("quote-text");
const quoteButton = document.getElementById("quote-button");

quoteButton.addEventListener("click", () => {
  const randomIndex = Math.floor(Math.random() * quoteList.length);

  quoteText.innerText = quoteList[randomIndex];
  wrapperDiv.style.backgroundColor = colors[randomIndex];
});
quoteButton.addEventListener(“click”, () => { const randomIndex = Math.floor(Math.random() * quoteList.length);
This line of code is responsible for our event in this case. It has 2 parameters, click and a function which does 3 main things on clicking -
- Generates a random number.
- Changes the text of the quoteText element based on that random number.
- Changes the color of the wrapperDiv element of the website based on that random number.
Meme Generator #
Below are the codes for HTML, CSS and JS of a random meme generator webpage!
<!DOCTYPE html>
<html lang="en">
<head>
  <link href="styles.css" rel="stylesheet" />
  <title>Cap That</title>
</head>
<body>
  <h1>Welcome to the Meme Machine</h1>
  <button id="generator-button">Generate Meme</button>
  <div id="meme-wrapper">
    <img width="600" id="random-meme" src="" />
    <h2 id="random-caption"></h2>
  </div>
  <script src="script.js"></script>
</body>
</html>
body {
  text-align: center;
}

#generator-button {
  padding: 10px;
  border: 2px solid black;
  border-radius: 5px;
  font-weight: bolder;
  font-size: xx-large;
}

#meme-wrapper {
  border: 4px solid black;
  width: 700px;
  height: 500px;
  padding: 5px;
  margin: 15px auto;
}

#random-meme {
  border-radius: 5px;
}

#random-caption {
  margin: 0;
}
const memeArray = [
  "https://i.imgur.com/bSi4xLb.png",
  "https://i.imgur.com/6y0G7N0.png",
  "https://i.imgur.com/LXnRao1.png",
  "https://i.imgur.com/Qqoxh1N.png"
];

const captionsArray = [
  "I’m not lazy, I’m on energy-saving mode.",
  "My brain has too many tabs open.",
  "I’ll do it tomorrow. Probably.",
  "Life was easier when Apple fell on Newton.",
  "Running late is my cardio.",
  "I need a 6-month vacation, twice a year.",
  "I put the pro in procrastinate.",
  "404: Motivation not found.",
  "I came. I saw. I made it awkward.",
  "This meeting could’ve been an email.",
  "I survived another day without knowing what I’m doing.",
  "Adulting is a scam.",
  "I started with nothing, and I still have most of it.",
  "My wallet and I are no longer on speaking terms.",
  "I don’t rise and shine — I caffeinate and hope.",
  "Why fall in love when you can fall asleep?",
  "I have a degree in Googling.",
  "I’m multitasking: I can waste time, be unproductive, and procrastinate all at once.",
  "Me: *exists*  Life: interesting choice."
];

const photo = document.getElementById("random-meme");
const caption = document.getElementById("random-caption");
const button = document.getElementById("generator-button");

button.addEventListener("click", () => {
  const memeIndex = Math.floor(Math.random() * memeArray.length);
  const captionIndex = Math.floor(Math.random() * captionsArray.length);

  photo.src = memeArray[memeIndex];
  caption.innerText = captionsArray[captionIndex];
});
A very easy and simple example of making something so cool with everything we have learnt so far!
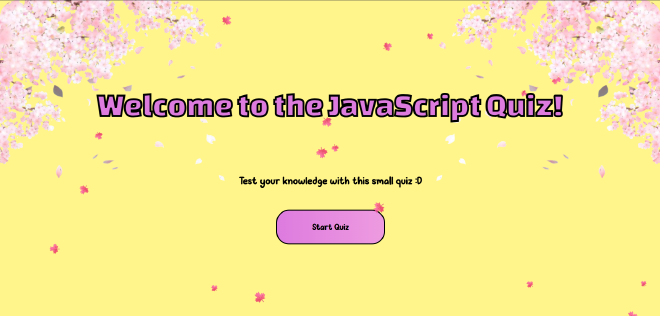
Quiz Maker! #
After learning the very basics of JavaScript, I think it’s time I should make something useful from it! I’ll be documenting my process here!
So we will have a very basic quiz app which will
- Have a question
- 4 option buttons
- “Next button”
- A final score screen
I might add more things as I make the project, but this is the basic layout.
First up, we have the HTML code structure. It is very basic and easy to understand
<!DOCTYPE html>
<html lang="en">
<head>
<meta charset="UTF-8" />
<title>Quiz App</title>
<link rel="stylesheet" href="style.css" />
</head>
<body>
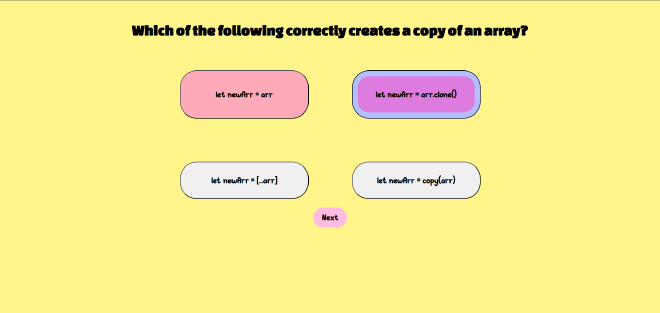
<div id="quiz-container">
<h2 id="question">Question will appear here</h2>
<div id="options">
<button class="option">Option 1</button>
<button class="option">Option 2</button>
<button class="option">Option 3</button>
<button class="option">Option 4</button>
</div>
<button id="next-btn">Next</button>
</div>
<script src="script.js"></script>
</body>
</html>
Skipping the style for now, we will go to the JavaScript Code.
const quizData = [

  {

    question: "What does JS stand for?",

    options: ["Java Source", "JavaScript", "Just Style", "Jumbo Script"],

    correct: 1

  },

  {

    question: "Which keyword is used to declare a variable?",

    options: ["var", "let", "const", "All of the above"],

    correct: 3

  }

];


const questionEl = document.getElementById("question");

const optionButtons = document.querySelectorAll(".option");

const nextBtn = document.getElementById("next-btn");


let currentQuestion = 0;

let score = 0;

function loadQuestion() {

  const currentQuiz = quizData[currentQuestion];

  questionEl.textContent = currentQuiz.question;


  optionButtons.forEach((button, index) => {

    button.textContent = currentQuiz.options[index];

  });

}


loadQuestion();

optionButtons.forEach((button, index) => {

  button.addEventListener("click", () => {

    if (index === quizData[currentQuestion].correct) {

      score++;

    }

    nextBtn.disabled = false;

  });

});
So we are using an array (quizData) which has the questions stored in them in the form of objects. Each element of the array is an object and that object has properties related to one question. Here we don’t have to name the objects because they can be accessed through the indices of the array so naming them will just increase the complexity.
Next up we have defined variables and used DOM manipulation to select questions, Option Buttons and the Next Button using their ID’s to change them later on.
For optionButtons, we have used (’.button’) to select only the answer option buttons and not all the buttons. ‘.’ here specifies a class. (We use ‘#’ for a specific ID of an element.)
questionEl.textContent = currentQuiz.question;
So the above code changes the <h2> element in the html to reflect the question that we will get by accessing the object.question and we have gotten the object from the array in the previous line. We can not use questionEl = “(the question)” because in JS, that just changes the variable and not the text itself.
 optionButtons.forEach((button, index) => {

    button.textContent = currentQuiz.options[index];
The above code makes use of the arrow function where instead of writing
function (button, index){

}
we make it cleaner and simpler. forEach() function helps in applying something or modifying multiple things at the same time. optionButtons variable contain a sort of list of all the options. So for each button changes the text of each button to the index of that button. The syntax of forEach button is such that, the element is written first and then the index. By default the indexing will start from 0 to the end of the data structure.
Here we simplified
optionButtons[0].textContent = currentQuiz.options[0];
optionButtons[1].textContent = currentQuiz.options[1];
The next code we will be simplifying is
optionButtons.forEach((button, index) => {

  button.addEventListener("click", () => {

    if (index === quizData[currentQuestion].correct) {

      score++;

    }

    nextBtn.disabled = false;

  });

});
Here we have another usage of forEach where we are passing the button element and the index which in turn has an event trigger. That is, after we click the button, a function will run which checks if the answer is correct and increases the score if it is. .disabled is an in-built property of form elements which helps in disabling and enabling those elements. Here, we are enabling the button after an answer has been selected.
Next up we have the logic for the next button
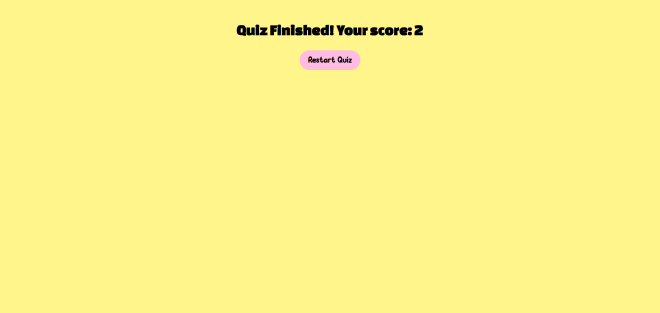
nextBtn.addEventListener("click", () => {
  currentQuestion++;

  if (currentQuestion < quizData.length) {
    loadQuestion();
    nextBtn.disabled = true;
  } else {
    questionEl.textContent = `Quiz Finished! Your score: ${score}`;
    document.getElementById("options").style.display = "none";
    nextBtn.style.display = "none";
  }
});
First, we are checking if there are more questions left. If there are more questions, we call the function responsible for displaying the next question and we disable the next button. If that was the last question, we display a message stating the quiz has ended. and we display ’none’ in the option buttons and the next button.
This gives us the most basic website without any glam or flair. But this is course-end project so we can not settle for a basic website!
Let’s add some quality of life additions! #
Selection? #
We can’t really see if our option is selected right now. Let’s change that and this is where we are going to use CSS for the first time in our project!
Starting off with the CSS
.option.selected {
  border: 5px groove pink;
}
Very simple. We declared that elements with the class option AND selected should have a pink groovy border which is 5 pixels thick.
Now how do we know when a button is selected? We will use something know as the classList. As the name suggests, it stores all the classes related to an element and helps in modifying the classes of the elements. So we set up our much used loop optionButtons.forEach((button) =>{}) which helps in applying something to all the option buttons. Next we add our Event Listener button.addEventListener(‘click’,() => {}) which applies a change after we press the button now comes the new piece of code
 optionButtons.forEach(btn => {
      btn.classList.remove("selected");
    });
    button.classList.add("selected");
This is another loop which first deselects all the buttons. This is for when we select a new option so that the previously selected option should not be highlighted anymore and then add the ‘selected’ class to the button which is actually selected so that it’s color can be changed using CSS.
Seems broken… #
Up until now our code updates the score on every click of the correct option. So if we click on the correct answer multiple times, there is a possibility that our score is more than the number of questions which is just not right. Let’s change it to so that the score only updates when the user presses the next button while that option is selected.
This will be the following chaanges
optionButtons.forEach((button, index) => {

  button.addEventListener("click", () => {
    selectedAnswer = index;
    nextBtn.disabled = false;
  });
});

nextBtn.addEventListener("click", () => {
  if (quizData[currentQuestion].correct=== selectedAnswer){
    score++;
  }
So we remove the score++ logic from the button clicking logic. Instead we declared a variable called selectedAnswer at the start of our code (not shown here) outside any functions so that it doesn’t end up becoming a local variable as multiple functions need to access it. We add the selected index as our selectedAnswer.
Next up, we go to the next button. We compare the correct answer to the selectedAnswer and increase the score if that is selected when we press the next button.
Make sure that you compare the right entities. I ended up comparing document.querySelector(".option.selected") === selectedAnswer which is like comparing a button to a number.
Restart! #
Let’s now add a button to restart the quiz. We have to make another event which resets the UI when pressed and loads the first question again and clears the score. We also need to remove any options that were previously selected. For that we first need to add another button in our HTML and link it to JS by it’s element ID.
HTML-
<button id="restart-btn" style="display: none;"> Restart Quiz </button>
At the start, the restart button will be hidden. It will only appear after the quiz ends. We achieve that putting the restart button in the loop which checks if current question is smaller than the length of the questions array. Then we use restartBtn.style.display = ‘block’; To make it visible.
restartBtn.addEventListener("click", () => {
  currentQuestion = 0;
  score = 0;
  selectedAnswer = null;

  document.getElementById("options").style.display = "block";
  nextBtn.style.display = "block";
  restartBtn.style.display = "none";
  nextBtn.disabled = true;

  optionButtons.forEach(button => {
    button.classList.remove("selected");
    button.disabled = false;
  });

  loadQuestion();
});
Animations! #
Okay so I really wanted to add animations to the website and so I took the help of Chat-GPT only for this part. I wanted something basic so I could understand it without actually copy pasting. This segment is dedicated to me figuring out the animations and trying to explain it in my own words.
const leavesContainer = document.getElementById("leaves-container");


function createLeaf() {

  const leaf = document.createElement("div");

  leaf.classList.add("leaf");


  leaf.textContent = "🍁";


  leaf.style.left = Math.random() * 100 + "vw";


  const size = Math.random() * 15 + 15;

  leaf.style.fontSize = size + "px";


  const duration = Math.random() * 5 + 5;

  leaf.style.animationDuration = duration + "s";


  leavesContainer.appendChild(leaf);


  setTimeout(() => {

    leaf.remove();

  }, duration * 1000);

}


setInterval(createLeaf, 400);
Okay so first up, very easy, we access the container responsible for the area which will have the leaves.
The function that we see next, well the name says what it does, it creates leaves. We set a variable ’leaf’ which creates a div. It then adds a class to that div, so now it becomes -
<div class = 'leaf'> </div>
Next we have .textcontent. This is used to control the text inside any element. Here leaf is div.
leaf.style.left = Math.random() * 100 + "vw";
This sets the position (horizontally) among the screen. The vw is viewport width which makes the output like - “56vw” which is a valid CSS command and so that becomes the horizontal position.
Similarly the next variable, ‘size’, uses Math.random( ) that we have learnt about and here +15 at the end makes the range 15 - 20 and in the next line we add ‘px’ unit to make it a valid CSS command. The same thing is done for the duration of the fall.
Next line adds the leaf element to the leaves container using a property .appendChild which helps adding that element inside a parent element. Here the Parent element is leavesContainer.
Now setTimeout() is used for running code later. It may run later than the mentioned time if the browser is busy but it will never run earlier. Here the time limit is given in milliseconds. So 1000ms = 1s
Similarly setInterval() is used to repeat a task after a certain time. It also doesn’t stop until specifically told to do so. In our case it creates a leaf after every 400 ms. clearInterval() is used to stop the setInterval task but in our case we want leaves to keep generating and we have the timeout to remove the leaves after a set duration so clearInterval() is not used here. An example would be -
const leafInterval = setInterval(createLeaf, 400);

clearInterval(leafInterval);
That is pretty much it for this blog! A super big shout-out to [[https://www.codedex.io/home]] for helping me get into JS with their hands-on approach of teaching. The examples I have used are from their JS course. I highly recommend checking them out!